blog

How to Choose a PG Accommodation: Checklist for Students and Professionals

Moving to a new city for college, a job, or professional training can be exciting. However, finding a comfortable and affordable place to stay is often one of the biggest challenges. Paying Guest (PG) accommodation is a popular choice among students and working professionals because it may offer furnished rooms, meals, housekeeping, and shared facilities at a comparatively manageable cost. But not every PG is suitable for everyone. A property may look attractive in photos but have poor cleanliness, hidden charges, strict rules, or an inconvenient location. Before finalising your stay, it is important to compare your options and check the facilities carefully. In this guide, we explain how to choose the right PG accommodation in India, along with a practical checklist to help you make an informed decision. 1. Choose a Location Close to Your College or Workplace Location should be one of your first considerations when choosing a PG. A room with a low monthly rent may not be a good deal if you spend too much time and money commuting every day. Before selecting a property, consider: Try visiting the area during both daytime and evening hours. This can help you understand traffic, accessibility, and the general environment. 2. Set a Realistic Monthly Budget PG accommodation costs vary depending on the city, locality, room type, and facilities provided. Do not compare properties based only on their advertised monthly rent. Calculate the total cost of living there. Your budget should include: Ask the owner or manager for a complete breakdown of charges before paying. For example, a PG with slightly higher rent may be more economical if meals, Wi-Fi, and electricity are included. 3. Decide Between a Single, Double, or Shared Room The type of room you choose will affect your comfort, privacy, and monthly expenses. Room type Best suited for Things to consider Single occupancy Professionals or people who prefer privacy Usually costs more Double sharing Students and working professionals Balance of privacy and cost Triple sharing Budget-conscious residents Less personal space Dormitory-style People seeking economical accommodation Limited privacy and storage Check how many people will actually stay in the room. Confirm whether the room shown during your visit is the same room you will receive. 4. Inspect the Room and Facilities Photos can be useful, but they do not always show the complete condition of a property. Whenever possible, visit the PG before booking. Check the following: Look for signs of dampness, leakage, mould, pests, or unpleasant smells. If an in-person visit is not possible, request a live video tour and ask for recent photos of the actual room and common areas. 5. Check Food Quality and Meal Timings Food is an important factor for students and professionals who depend on PG meals. Ask the manager about: If possible, speak with current residents about the food quality and consistency. Make sure meal timings fit your college schedule, office hours, or shift work. 6. Understand the PG Rules and Restrictions Every PG has its own rules. Some may be flexible, while others may have strict restrictions. Before moving in, ask about: Read the rules carefully and make sure they are suitable for your lifestyle. Students should check whether the rules fit their academic schedule. Professionals should confirm whether late working hours or weekend shifts are permitted. 7. Check Safety and Security Safety should never be overlooked when choosing accommodation. Inspect the building and ask the owner or manager about security arrangements. Look for: For women’s PG accommodation, also ask about access control, visitor verification, emergency support, and privacy arrangements. Avoid properties where safety concerns are dismissed or where you feel uncomfortable during the visit. 8. Verify the Owner or PG Manager Before paying a deposit, confirm who is responsible for the accommodation. Ask for the owner’s or manager’s name and contact details. If the person is operating the PG on behalf of the owner, clarify their authority to collect rent and deposits. You should also: If anything seems suspicious, pause the transaction and verify the details independently. 9. Read the PG Agreement Carefully A written agreement can help prevent misunderstandings between residents and the accommodation provider. Before signing, check: Ask for clarification if any clause is confusing. Do not rely only on verbal promises. Make sure important commitments are included in writing and retain a copy of the agreement and payment receipts. 10. Check Internet, Electricity, and Water Availability Students may need reliable internet for online classes, assignments, and exams. Professionals may require a stable connection for meetings and remote work. Ask about: If you work remotely, check whether the PG has a quiet place to work and whether internet usage is restricted. 11. Talk to Current Residents Current residents can provide useful information that may not appear in the listing. Ask them: Their feedback can help you understand the actual living experience. 12. Avoid Common PG Booking Scams Some accommodation listings may contain misleading photos, fake availability, or unrealistic prices. Watch out for these warning signs: Never transfer a deposit simply because someone says the room will be booked by another person soon. Use traceable payment methods and collect a written receipt. PG Accommodation Checklist Before Booking Use this checklist when visiting or comparing PG properties: Final Thoughts Choosing the right PG accommodation requires more than comparing rent and room photos. Location, cleanliness, food, safety, rules, facilities, and deposit terms all contribute to your living experience. Students should focus on affordability, study-friendly surroundings, and convenient access to their college. Working professionals should also consider commute time, internet connectivity, privacy, and flexibility for work schedules. Take time to visit the property, speak with residents, and read the agreement before paying. A careful decision can help you find accommodation that feels comfortable, safe, and suitable for your needs. If you are searching for a PG in a new city, explore available accommodation listings on Kahi.in and compare options before making your final decision. Disclaimer: This article is for general informational purposes only. Always verify the property, provider, … Read more


Flats for Rent Without a Broker: How to Find Owner Listings in India

Flats for Rent Without a Broker: How to Find Owner Listings in India

Finding a good flat for rent can be challenging, especially when you want to avoid paying brokerage charges. Many tenants spend time contacting property agents, comparing rental prices, and arranging property visits before finding a suitable home. In some cases, brokerage fees can add a significant amount to the initial moving cost. The good news is that you can find flats for rent without a broker by searching for direct-owner listings, using online classified platforms, and following a few practical steps. Whether you are looking for a 1BHK, 2BHK, or family apartment, finding a genuine owner listing can help you communicate directly with the landlord and understand the rental terms more clearly. In this guide, we explain how to find flats directly from owners in India, avoid fake listings, negotiate rent, and complete the rental process safely. 1. Search for Direct-Owner Rental Listings Online Online classified platforms make it easier to discover rental properties in different cities and localities. Instead of depending only on property agents, you can search for advertisements posted directly by owners. When searching online, use phrases such as: You can explore property advertisements on platforms such as Kahi.in and compare available options. Before contacting a lister, check the property description, photographs, rent, security deposit, location, and contact information. Ask clearly whether the person is the property owner or an authorised representative. 2. Choose the Right Location Before Searching Your preferred location can make a major difference to your rental budget and daily routine. Before browsing listings, shortlist areas based on your workplace, educational institution, family requirements, and transportation needs. Consider these factors: For example, a flat located slightly farther from a busy commercial area may offer more space at a lower rent. However, calculate your daily travel expenses before deciding. 3. Set Your Rental Budget Do not focus only on the monthly rent. Renting a flat involves several additional expenses that you should consider before finalising a property. Your rental budget may include: Expense What to consider Monthly rent Amount payable to the landlord Security deposit Refundable amount, subject to agreement terms Maintenance Monthly society or building charges Electricity and water Utility bills and applicable charges Moving expenses Packers, transport, and shifting costs Agreement expenses Applicable stamp duty, registration, and documentation charges One benefit of finding a genuine owner listing is the possibility of avoiding a separate brokerage fee. However, always confirm whether the person advertising the property is actually the owner and whether any other charges apply. 4. How to Identify Genuine Owner Listings Not every advertisement marked “owner” is necessarily posted by the property owner. Some listings may be uploaded by brokers, representatives, or people who are not authorised to rent the property. Use these steps to check a listing: Check the advertiser’s details: Ask for the person’s name and whether they own the flat or are authorised to represent the owner. Request property information: Confirm the complete address, flat number, floor, furnishing status, rent, and security deposit. Ask for current photographs: Compare the pictures with the actual property during your visit. Be cautious if the advertiser repeatedly avoids showing the flat. Speak directly with the owner: If an intermediary is involved, ask to speak with the owner and confirm their authority to arrange the rental. Verify ownership documents: Before making a payment, request appropriate ownership evidence, such as a sale deed or other relevant property documents. Compare the owner’s name and property details with the proposed agreement. A listing’s appearance on an online platform does not automatically prove ownership or guarantee that its details are accurate. Independent verification is essential. 5. Contact the Owner and Ask the Right Questions Once you find a suitable flat, contact the advertiser and gather important information before arranging a visit. Here are some useful questions: Getting these details early can save time and help you compare different rental options. 6. Visit the Flat Before Paying Any Money Never finalise a rental property based only on photographs or a phone conversation. Arrange a physical visit and inspect the flat carefully. If you cannot visit personally, ask someone you trust to inspect it. A live video tour may help with an initial assessment, but it should not replace proper verification. During the visit, check: Also, ask about society rules, visitor policies, waste collection, and any restrictions that may affect your stay. 7. Negotiate Rent Directly With the Owner When you deal directly with the owner, you can discuss rental terms without depending on an intermediary. Before negotiating, compare similar flats in the same locality. Consider the property’s condition, furnishing, floor, parking, building facilities, and distance from important locations. You can negotiate: Be polite and realistic. If the flat needs repairs or the rent is higher than comparable properties, explain your concerns and suggest reasonable terms. Always ensure that agreed changes are included in the written rental agreement. 8. Verify Documents and Sign a Rental Agreement A written rental agreement protects both the landlord and the tenant by recording the terms of the arrangement. Before signing, check the following: If someone other than the owner signs the agreement, ask for valid written authorisation or a Power of Attorney that permits them to rent out the property. Follow the applicable stamp duty and registration requirements in your state. For example, Maharashtra has specific requirements for leave-and-licence agreements under Section 55 of the Maharashtra Rent Control Act. Also check whether tenant information or police intimation is required under the local police process. Requirements can vary by location. 9. Avoid Common Rental Scams Searching for owner listings online can save time, but tenants should remain careful when contacting unknown advertisers. Watch out for these warning signs: Advance payment requests: Avoid transferring token money or a security deposit before inspecting the property and verifying the person’s authority to rent it. Unusually low rent: A property advertised far below the normal local price may require additional verification. No physical visit allowed: Be cautious if the advertiser repeatedly refuses a visit or provides excuses for … Read more

How to Sell Your Old Phone for the Best Price in India

How to Sell Your Old Phone for the Best Price in India

Planning to upgrade to a new smartphone? Selling your old phone can help you recover part of its original cost and put that money towards your next purchase. However, getting the best price requires more than simply posting an advertisement online. Your phone’s condition, model, storage capacity, battery health, accessories, and current market demand can all affect its resale value. The way you prepare the device, create your listing, and negotiate with buyers can also make a difference. Whether you own an iPhone, Samsung Galaxy, OnePlus, Redmi, Vivo, Oppo, or another smartphone, this guide explains how to sell your old phone for the best price in India. 1. Check Your Phone’s Current Market Value Before listing your phone for sale, research its current resale price. This helps you set a realistic asking price and avoid accepting an unnecessarily low offer. Start by checking listings for the same phone model, storage variant, and similar condition. Compare these details: For example, two phones of the same model may sell at different prices if one has a clean display, a healthy battery, and complete accessories while the other has scratches or a replaced screen. Remember that advertised prices are not always the final selling prices. Compare several listings and consider how long similar devices have been available. 2. Clean Your Phone Before Taking Photos First impressions matter when selling a used smartphone. A clean, well-presented device can make your listing more attractive to potential buyers. Before photographing your phone: Do not use harsh chemicals or abrasive materials that could damage the device. If the phone has scratches, dents, or cracks, show them honestly in your listing. Clear disclosure builds trust and reduces the chance of disagreements during the sale. 3. Take Clear, High-Quality Photos Good photographs help buyers understand exactly what you are selling. You do not need a professional camera; a smartphone camera and natural lighting are usually sufficient. Capture pictures of: Use a clean background and avoid filters that change the phone’s appearance. Make sure the photos represent the actual device rather than stock images. A transparent listing can attract more serious buyers and make negotiations easier. 4. Write an Honest and Detailed Listing A clear product description answers common buyer questions before they contact you. Include the following information: For example: Samsung Galaxy smartphone for sale Replace the example details with accurate information about your own phone. Never claim that a phone is unused, original, or under warranty unless you can substantiate the claim. 5. Choose the Right Selling Platform The platform you choose can influence the number of potential buyers, the effort required to sell, and the price you receive. Common options include: If you want to sell directly, a marketplace listing can help you compare offers from different buyers. Read the platform’s rules, understand any applicable fees, and follow safe transaction practices. You can explore phone listings and marketplace options on Kahi.in to help you plan your buying or selling journey. 6. Set a Smart Asking Price Setting the right price is one of the most important steps when selling an old phone. If your asking price is much higher than comparable devices, buyers may ignore your listing. If it is too low, you could lose money unnecessarily. Use this approach: You may leave a modest negotiation margin if bargaining is common in your market, but avoid inflating the price far beyond comparable listings. The best price is the highest reasonable amount a genuine buyer is willing to pay—not necessarily the highest price advertised online. 7. Highlight Genuine Benefits and Accessories Accessories can make your listing more appealing, especially when they are in good condition. Mention whether you have the original box, charging cable, compatible charger, protective case, purchase invoice, or proof of warranty. Also highlight genuine benefits such as: Do not buy expensive accessories solely to increase the resale price unless you have a clear reason to believe the additional cost will be recovered. 8. Protect Your Personal Data Before Selling Your smartphone may contain private photos, messages, documents, banking apps, saved passwords, and account information. Protecting this data is essential. Before handing over the device: For iPhones, follow Apple’s official instructions for preparing a device for sale. For Android phones, follow the relevant manufacturer’s guidance. Never share your Apple Account password, Google password, banking PIN, or one-time password with a buyer. A genuine buyer does not need your private login credentials. 9. Avoid Common Phone-Selling Scams Online phone sales can attract fraudulent buyers. Stay cautious even if someone appears friendly or offers to complete the transaction quickly. Watch out for these warning signs: Fake payment screenshots: Check your bank or payment app directly. Do not hand over the phone based on a screenshot or message alone. UPI collect requests: You generally do not need to enter your UPI PIN to receive money. Never approve an unexpected payment request or share your PIN. Overpayment tricks: Be cautious if a buyer claims to have paid extra and asks you to refund the difference before you can independently verify the transaction. Unnecessary advance requests: Do not pay a buyer a fee to release payment or arrange a supposed courier service. Pressure to rush: Avoid buyers who refuse reasonable inspection or insist that you ignore normal safety checks. Unsafe meetings: For an in-person sale, choose a public, well-lit location and consider taking someone with you. If selling through a marketplace, keep relevant communication and transaction records and follow its safety guidance. 10. Negotiate Confidently With Buyers Some buyers will negotiate even when your asking price is reasonable. Prepare for this by deciding your minimum acceptable amount in advance. When responding to an offer: Avoid misleading claims such as saying that several buyers have already offered more if that is not true. Honest communication can help you complete a smoother transaction. 11. Choose the Right Time to Sell Smartphone resale prices can change when new models launch, festive sales begin, or manufacturers reduce prices on older devices. If you already … Read more

How to Check If a Used iPhone Is Genuine: A Complete Buyer’s Guide

How to Check If a Used iPhone Is Genuine: A Complete Buyer’s Guide

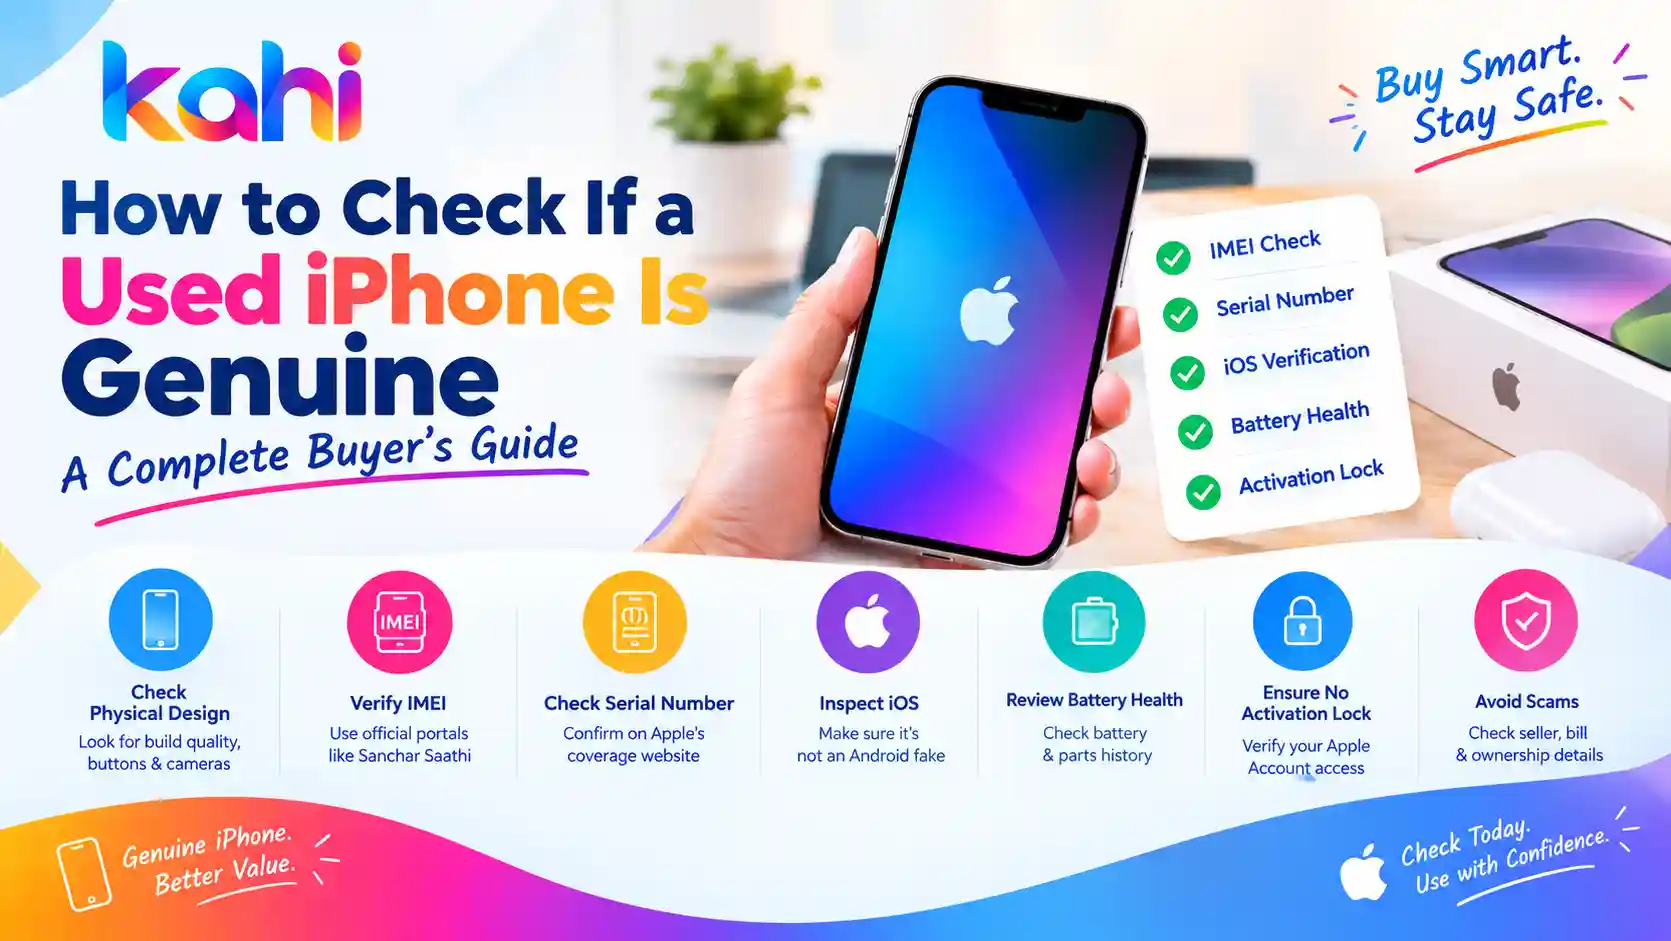
Buying a second-hand iPhone can help you save money while enjoying Apple’s features and performance. However, used iPhones can come with risks, including counterfeit devices, replaced parts, hidden damage, blacklisted IMEIs, and phones linked to someone else’s Apple Account. Before buying a pre-owned iPhone, it is important to verify its authenticity and check its condition. A phone that looks like an original iPhone may still have replaced components or other issues that affect its performance and value. In this guide, you will learn how to check if a used iPhone is genuine, verify its IMEI and serial number, inspect important features, and avoid common second-hand phone scams in India. 1. Check the iPhone’s Model and Physical Design Start by inspecting the phone’s exterior. Compare its design with the official specifications and images for the exact iPhone model. Check the following: Physical appearance alone cannot prove authenticity. Counterfeit devices may copy the exterior of genuine iPhones, so you must also check the software and device information. 2. Verify the IMEI Number The International Mobile Equipment Identity (IMEI) is a unique identifier used for mobile devices. Checking it can help you identify inconsistencies and investigate whether a phone has been reported lost or stolen. How to find the IMEI on an iPhone Compare the IMEI shown in the settings with the number displayed through the dial code and the device’s packaging or documentation, if available. Some models support multiple IMEIs, so compare the corresponding identifier carefully. In India, you can use the official Department of Telecommunications Sanchar Saathi portal to check a handset’s IMEI through its Know Your Mobile (KYM) service. Do not buy the phone if the identifiers are inconsistent or the seller cannot reasonably explain the discrepancy. A clean IMEI result alone does not prove that the device is genuine or that the seller legally owns it. 3. Check the Serial Number on Apple’s Website Apple provides a coverage-check service that lets you look up a device using its serial number. To check it: Confirm that the returned device information is consistent with the iPhone being sold. Important: A serial number that produces a valid result does not guarantee authenticity. Counterfeit phones can copy serial numbers from genuine devices. Use this check alongside the other steps in this guide. 4. Make Sure the Phone Runs Genuine iOS One useful way to identify a counterfeit iPhone is to inspect its operating system and built-in features. A genuine iPhone runs Apple’s iOS, not Android disguised to look like an iPhone. Check these features: Do not rely on just one test. Counterfeit devices may imitate the appearance of iOS, and software recognition should be considered alongside the device’s identifiers, hardware, and ownership status. 5. Check Parts and Service History A genuine iPhone may have undergone repairs, including a screen or battery replacement. This does not automatically make it counterfeit, but you should understand what has been replaced. On supported models and iOS versions: Depending on the model and repair, the section may identify certain components as genuine, used, unknown, or otherwise requiring attention. Pay particular attention to the display, battery, cameras, and other listed components. An unknown-part message does not necessarily mean the entire phone is fake. It may indicate an unverified, nongenuine, or improperly functioning replacement part. Ask the seller for repair records and have a qualified technician inspect the device if necessary. 6. Check Battery Health and Charging Battery condition can significantly affect the value of a used iPhone. To check battery health: A lower maximum capacity means the battery has less capacity than when it was new. It does not, by itself, mean the iPhone is fake. Also test the charging port, cable connection, wireless charging if supported, and whether the phone heats up unusually during normal use. Do not rely only on the percentage shown by the seller. Check the information directly on the device. 7. Confirm That Find My and Activation Lock Are Not Blocking You One of the most important checks when buying a used iPhone is ensuring the previous owner’s Apple Account is no longer linked to the device. A phone protected by Activation Lock may require the previous owner’s Apple Account credentials before it can be activated and used. Before paying: Never accept a promise that the seller will remove the lock later. If the device requests the previous owner’s account during activation, ask them to resolve it before completing the purchase. Avoid buying a phone that is advertised as iCloud locked or that requires bypassing Apple’s security protections. 8. Test the Main Features Before Paying Even if the iPhone appears genuine, it may have hardware problems. Use this checklist during inspection: Component What to check Display Dead pixels, touch response, brightness, and discolouration Cameras Front and rear cameras, focus, video, and flash Face ID or Touch ID Whether the supported biometric feature works Speakers Music, ringtone, and call audio Microphones Voice recordings and calls Buttons Power, volume, and other model-specific controls Connectivity Wi-Fi, Bluetooth, mobile network, and GPS SIM/eSIM Confirm compatibility with your carrier and intended setup Charging Stable charging and port condition Storage Available capacity and consistency with the advertised model Make a test call and, if possible, test the phone with your own SIM. Confirm that the phone’s storage and model match the seller’s description. 9. Check the Seller, Bill, and Ownership Details A genuine phone can still be stolen, misrepresented, or sold without proper ownership documentation. Ask the seller for the original purchase invoice, if available, and check whether the details are consistent with the device. An invoice is helpful but should not be treated as conclusive proof of ownership. You should also: Do not share passwords or verification codes with the seller, and never let anyone else keep control of your Apple Account. 10. Watch Out for These Second-Hand iPhone Scams Be cautious if you encounter any of the following warning signs: Unusually low prices: A price far below comparable listings may indicate a scam, a locked phone, hidden … Read more

How to Check a Second-Hand Phone Before Buying: 15 Tests

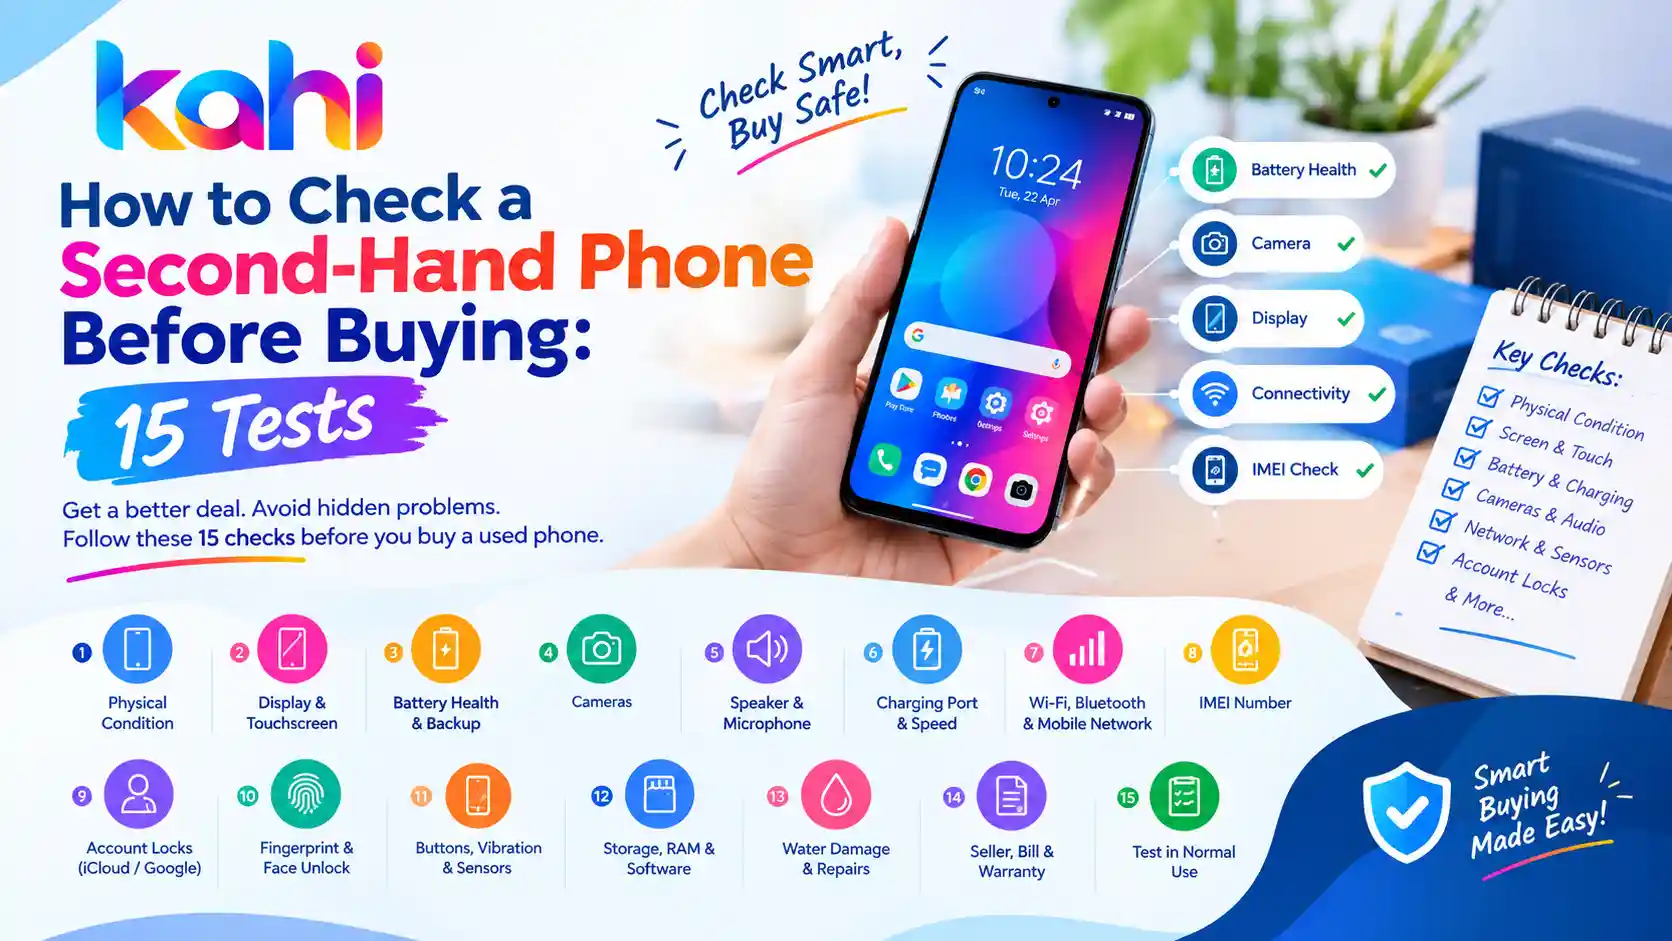
Buying a second-hand phone can help you save money while getting a smartphone with useful features. However, a phone that looks perfect from the outside may have hidden problems, such as a weak battery, damaged display, faulty camera, network issues, or software restrictions. Whether you are buying a used iPhone, Samsung Galaxy, OnePlus, Redmi, Vivo, or another smartphone, checking the device properly before paying is essential. In this guide, we explain how to check a second-hand phone before buying with 15 simple tests. These checks can help you identify common problems, avoid suspicious deals, and make a more informed purchase through platforms such as Kahi.in. 1. Check the Phone’s Physical Condition Start by carefully examining the phone’s body. Look for cracks, dents, scratches, loose buttons, and signs of impact. Pay particular attention to the corners, screen edges, camera lenses, charging port, and back panel. These areas can reveal whether the phone has been dropped or poorly repaired. Also check for gaps between the frame and screen, unusual bulges, or a back panel that appears to be lifting. A swollen battery can push the screen or back cover outward and requires professional attention. What to do: Remove the case, inspect the device under good lighting, and ask the seller about any visible damage. 2. Test the Display and Touchscreen The display is one of the most expensive components to replace, so test it carefully. Open a white screen, a dark screen, and several colourful images. Look for dead pixels, unusual lines, flickering, discolouration, dark patches, and uneven brightness. Next, open the keyboard or a drawing app and touch every area of the screen. Make sure the touchscreen responds accurately, including near the edges. Check whether the brightness controls work and whether the screen changes brightness smoothly. Warning sign: Random touches, unresponsive areas, or visible lines may indicate display damage or a previous low-quality repair. 3. Check Battery Health and Backup A used phone may work normally but have a battery that drains quickly or shuts down unexpectedly. Check the battery health information available in the phone’s settings. The exact feature depends on the model and operating system. Some phones provide a battery health percentage, while others offer only usage statistics or diagnostic tools. Ask the seller how long the battery lasts during normal use. If possible, use the phone for several minutes with the screen on and observe whether the battery percentage drops unusually quickly. Look for overheating, sudden shutdowns, or battery swelling. Remember that a short inspection cannot accurately establish the phone’s total battery capacity or long-term backup. 4. Test the Cameras Open the front and rear cameras and take several photographs in different lighting conditions. Check the following: Switch between all available lenses, such as ultra-wide and telephoto cameras. Test autofocus by photographing an object close up and another farther away. If the camera shakes excessively, fails to focus, or produces persistent spots, ask whether the camera module has been repaired. 5. Test the Speaker and Microphone Audio problems can be easy to overlook during a quick inspection. Play a video or music track at different volume levels. Listen for crackling, distortion, or unusually low sound. Then record a voice note and play it back. If possible, make a test call to check the earpiece and microphone. Also test the loudspeaker during a call and check whether the phone’s audio remains clear. If the seller refuses a simple audio test, take extra care before proceeding. 6. Check the Charging Port and Charging Speed Connect a compatible charger and confirm that the phone begins charging reliably. Gently check whether the connector fits securely. If the phone supports fast charging, confirm that the relevant charging indicator appears when using a compatible charger and cable. Look for: Do not force a cable into the port or insert metal objects to clean it. If you suspect damage or moisture, have the device checked by a technician. 7. Test Wi-Fi, Bluetooth, and Mobile Network A phone may look fine but have connectivity problems. Insert your SIM card if possible and check whether the phone detects the network. Make a test call, send a message, and test mobile data. Connect to a Wi-Fi network and pair the phone with Bluetooth headphones or another device if available. If the model supports GPS navigation, open a maps application and check whether it can locate you. For a dual-SIM phone, test both SIM slots where practical. Important: Confirm that the phone supports the network bands and SIM type you intend to use. 8. Check the IMEI Number The IMEI is a unique identifier used to identify a mobile device. Checking it can help you detect certain inconsistencies before purchasing. On many phones, you can display the IMEI by entering *#06# in the dialler. You can also check the device settings or original packaging, although packaging alone is not proof of authenticity. Compare the IMEI shown on the phone with the relevant documentation where available. In India, use the official Sanchar Saathi portal or its CEIR-related services to check the IMEI status and relevant blocking information. Do not buy a phone if its identifiers appear tampered with, the seller cannot explain a mismatch, or the device is reported blocked. An IMEI check does not guarantee that a phone is genuine or free of every legal or ownership issue. 9. Check for iCloud, Google Account, and Activation Locks This is one of the most important tests when buying a used smartphone. For an iPhone, ask the owner to sign out of their Apple Account and disable Find My as required before erasing the device. The phone should be ready for the new owner’s setup without asking for the previous owner’s credentials. For an Android phone, the seller should remove their Google account and other relevant accounts before performing a factory reset. Otherwise, Factory Reset Protection may ask for the previous account during setup. Ideally, complete the reset and initial setup with the seller present before paying. Never buy a … Read more

Bike Ownership Transfer in India: Documents and Process

bike ownership

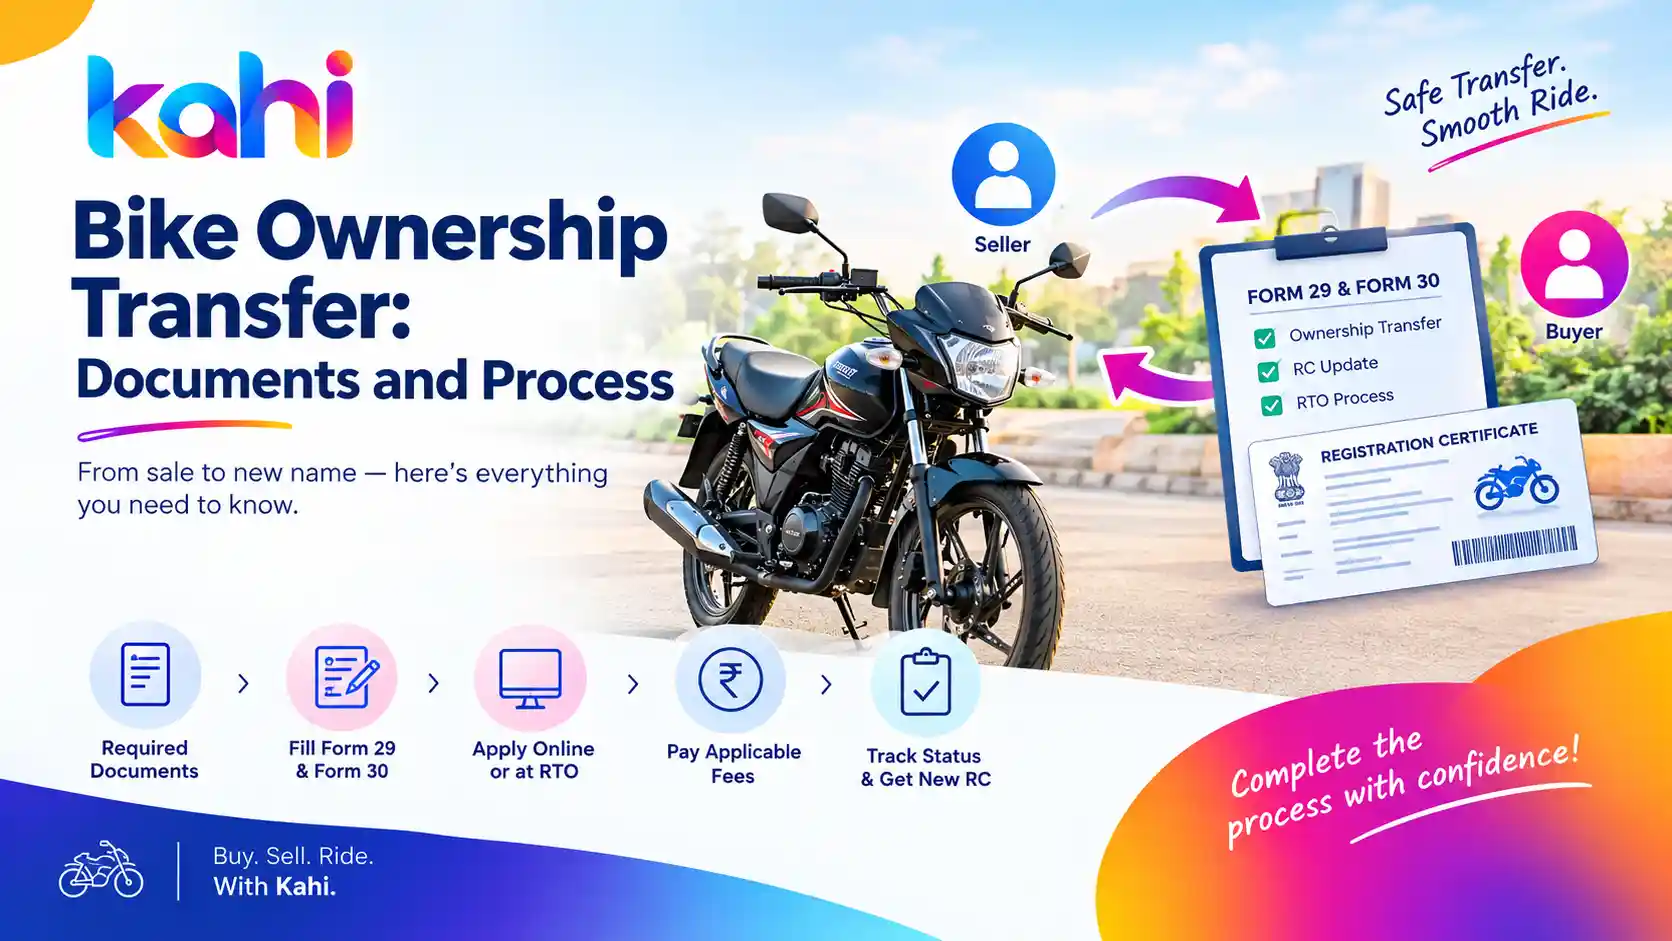
Buying or selling a second-hand bike can be a smart way to save money or earn a fair resale price. However, completing the payment and handing over the keys is not enough. You must also ensure that the bike’s registration certificate (RC) is transferred to the new owner’s name. Bike ownership transfer is the official process of updating the registered owner’s details with the Regional Transport Office (RTO). Completing this process helps protect both the buyer and seller from future documentation problems, traffic challans and ownership disputes. In this guide, we explain the documents required for bike ownership transfer in India, the role of Forms 29 and 30, the application process, possible fees and common mistakes to avoid. What Is Bike Ownership Transfer? Bike ownership transfer is the process of officially recording a new owner’s name in the vehicle registration records after a sale. For example, if you purchase a second-hand Honda, Hero, TVS, Bajaj or Royal Enfield motorcycle, you need to apply for an RC transfer so that the vehicle is legally recorded in your name. The same process applies when you sell your existing bike to another person. Completing the transfer helps establish a clear ownership record and makes it easier to manage insurance, future resale and other vehicle-related formalities. Documents Required for Bike Ownership Transfer Before starting the application, the buyer and seller should prepare the necessary documents. Requirements can vary depending on the state, RTO and circumstances of the transfer. Essential documents checklist Document Purpose Form 29 Notice of transfer submitted by the seller Form 30 Application for transfer of ownership Original Registration Certificate (RC) Confirms the vehicle’s registration details Valid bike insurance certificate Provides evidence of insurance Valid Pollution Under Control (PUC) certificate Confirms applicable emission compliance Identity proof May be requested for verification Address proof Helps establish the buyer’s address PAN card or Form 60 May be required under applicable rules Sale receipt or sale agreement Records the transaction and handover details Applicable RTO fee Payment for processing the transfer The RTO may request additional documents, photographs, an undertaking or other verification depending on local requirements. You can access official vehicle registration forms through the Parivahan website. What are Form 29 and Form 30? Form 29: Notice of transfer of ownership The seller uses Form 29 to notify the relevant registering authority that the bike has been sold and delivered to the buyer. Form 30: Application for transfer of ownership Form 30 is used to apply for the formal transfer of ownership in the registration records. It contains details relating to the seller, buyer and vehicle. Both forms are important in a standard sale. Make sure the information is accurate and that the required signatures are completed. Bike Ownership Transfer Process in India: Step by Step Follow these steps when buying or selling a second-hand bike. Step 1: Verify the bike and its documents Before making payment, check the registration number, chassis number and engine number against the RC. Also verify the seller’s identity and confirm that the seller is the registered owner or is legally authorised to complete the transaction. Check the following: If the bike has an active loan, coordinate with the lender to complete the required loan closure and hypothecation formalities. Step 2: Complete the sale agreement Prepare a sale receipt or written agreement that records the transaction. Include the bike’s registration number, make and model, agreed sale price, date and time of handover, and the names and contact details of both parties. Keep copies of the signed document and payment proof. These records can help establish when possession was transferred if a dispute arises later. Step 3: Fill in Form 29 and Form 30 The seller and buyer should complete the relevant ownership transfer forms with the correct details. Check the registration number, chassis number, names, addresses and signatures carefully. Errors or missing information can delay processing. Download the official forms from the Parivahan forms page. Step 4: Apply online or through the RTO Depending on the state and the services available for your registration, you may be able to begin the application online through the VAHAN vehicle services portal. The general online process is: Some applications require an RTO visit, document submission or vehicle verification. Follow the instructions shown for your particular registration. Step 5: Submit documents and pay the fee Submit the required documents according to the instructions from the portal or RTO. The applicable fee depends on the vehicle category and the service being requested. Additional charges may apply in certain cases, such as interstate transfers, delayed applications or related registration formalities. Always use an official payment channel and keep the receipt. Step 6: Track the application Use the application or acknowledgement number to check the transfer status through the relevant official service. If the application is pending, check whether the RTO requires additional documents, corrected information or an appointment. Step 7: Confirm the new RC details After approval, check that the new owner’s details have been updated in the registration records. The buyer should verify the updated RC information and retain the digital or physical document as applicable. The seller should keep the sale agreement, transfer acknowledgement and other proof of submission. Do not assume the transfer is complete simply because the application has been submitted. How Long Does Bike Ownership Transfer Take? The time required depends on the RTO, completeness of the documents, verification requirements and whether the transfer is within the same state or involves another state. Under the general central guidance for a normal sale, the buyer’s Form 30 application is to be made within 14 days for a vehicle registered within the same state and within 45 days for a vehicle registered outside the state, with additional requirements for an interstate transfer. State-specific procedures and instructions may differ, so confirm the applicable deadline with the relevant RTO before applying. Do not delay the paperwork after the sale. For official guidance, refer to Parivahan’s ownership transfer information. Bike Ownership Transfer Fees There … Read more

Used Bike Price Check: How to Value a Second-Hand Bike in India

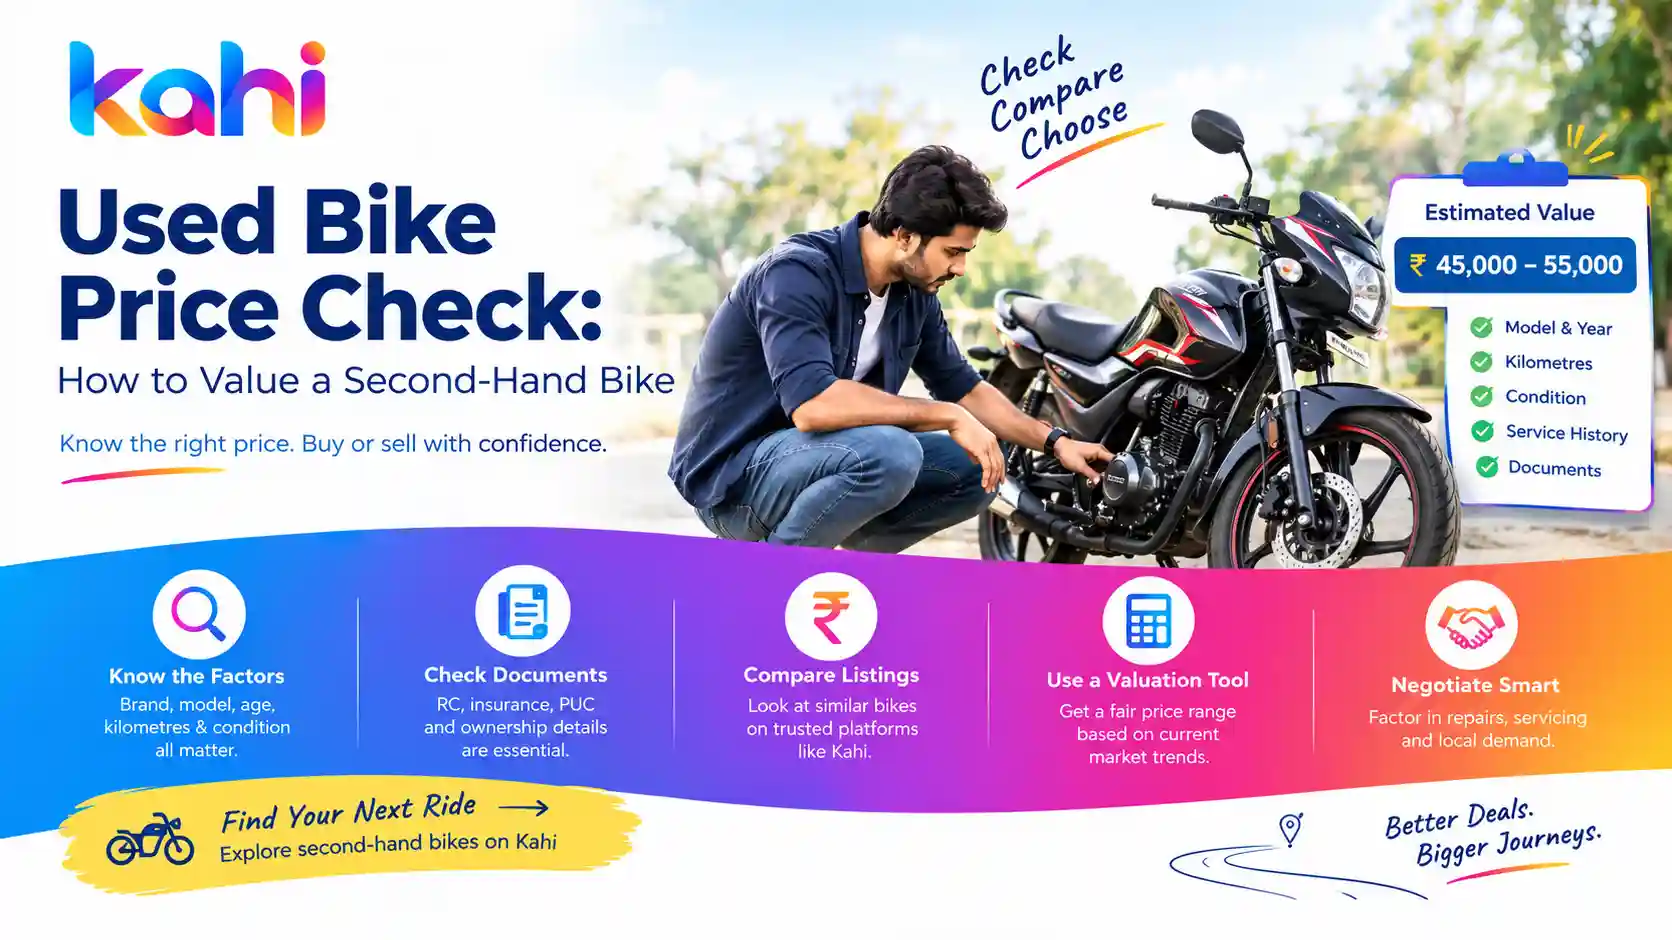
Buying or selling a second-hand bike can be a smart way to save money or get a fair return on your existing vehicle. But one question often creates confusion: What is the right price for a used bike? Some sellers ask more than the bike is worth, while some buyers negotiate too aggressively without understanding the vehicle’s condition or market demand. The best way to avoid these problems is to check the bike’s current market value before making a deal. In this guide, we will explain how to value a second-hand bike in India, which factors affect its resale price, how to compare similar listings, and how to negotiate a fair deal. What Is the Value of a Second-Hand Bike? The value of a second-hand bike is the estimated price a buyer is reasonably willing to pay for it in the current market. This price depends on more than the original showroom cost. For example, two bikes of the same model and year may have different prices because one has a complete service history, fewer kilometres, and better tyres, while the other needs repairs. A used bike valuation is an estimate rather than a guaranteed selling price. Online calculators can help you establish a starting range, but you should also compare local listings and inspect the vehicle before deciding on the final amount. 7 Factors That Affect Second-Hand Bike Prices 1. Brand, Model and Current Market Demand The brand and model can significantly influence resale value. Popular commuter motorcycles and scooters often attract buyers because they are practical for daily travel and generally have accessible spare parts and servicing. When checking the price, consider: A premium motorcycle does not automatically have a higher resale value. Its maintenance costs, buyer demand, and condition also matter. 2. Age of the Bike A bike generally loses value as it gets older because of depreciation, wear and tear, and changes in available models and features. However, depreciation is not identical for every motorcycle. A well-maintained, popular model may retain its value better than a less-demanded model of the same age. Check the manufacturing year and first registration date. Compare your bike with listings of similar age rather than applying one fixed depreciation percentage to every vehicle. 3. Kilometres Driven The total kilometres travelled provide an indication of how much the bike has been used. Generally, lower genuine kilometres can support a higher asking price, but the odometer reading should never be the only deciding factor. Check whether the reading matches the bike’s overall condition, service records, footrests, handlebar grips, seat and other frequently used parts. A motorcycle that has travelled more kilometres but received regular servicing may be a better purchase than one with lower kilometres and poor maintenance. 4. Engine and Overall Condition The mechanical condition of a bike can make a major difference to its market value. Before deciding on a price, inspect: If you are unsure about the engine or frame, arrange an inspection by a trusted mechanic. Any likely repair costs should be considered during negotiation. 5. Service and Accident History A bike with regular servicing and supporting bills can be more attractive to buyers than one with an unclear maintenance history. Ask the seller about oil changes, major repairs, replaced parts, accidents and any engine work. Check available service records and look for signs of inconsistent maintenance. Accident damage does not always make a bike unsuitable, but serious frame or structural damage deserves particular caution. Do not pay a premium just because the bike looks clean after repainting. 6. Number of Previous Owners A first-owner bike with verifiable documents may be easier to evaluate and sell. Multiple previous owners can affect buyer confidence, although the effect on price depends on the model, maintenance and ownership history. Verify that the seller is the registered owner or is legally authorised to sell the bike. Match the registration details with the vehicle and confirm that the required ownership-transfer process can be completed. 7. Documents, Insurance and Pending Dues Good paperwork can make a bike easier to sell and transfer. Before finalising the price, check: If a loan remains outstanding or documents need correction, clarify how the issue will be resolved before payment. Do not treat a low asking price as a bargain until you understand the paperwork involved. How to Check the Fair Market Price of a Used Bike Follow these practical steps to estimate the value of a second-hand bike. Step 1: Identify the Exact Bike Details Write down the brand, model, variant, manufacturing year, registration year, kilometres travelled, fuel type and general condition. Accurate details help you compare similar vehicles. Step 2: Compare Similar Listings Online Check used-bike listings on platforms such as Kahi and other established marketplaces. Compare bikes with similar models, ages, kilometre readings and locations. Look at several listings rather than relying on a single seller’s asking price. Remember that an advertised price is not necessarily the final amount paid after negotiation. You can explore available two-wheeler listings on Kahi.in to understand how sellers present their bikes and compare similar options. Step 3: Use an Online Valuation Calculator An online bike resale calculator can provide an initial estimate based on the model, age, kilometres and condition. Treat the result as a reference range, not a guaranteed market price. Calculator estimates may not fully account for accident damage, unusual modifications, local demand or the cost of immediate repairs. Step 4: Inspect the Bike in Person If you are buying, arrange a physical inspection and a safe test ride with the owner’s permission. Ideally, examine the bike when the engine is cold so you can assess how easily it starts. For expensive repairs or uncertain mechanical condition, ask a mechanic to inspect it before you commit. Step 5: Calculate Repair Costs List any repairs or replacements that may be needed soon, such as tyres, battery, chain set or brake components. Obtain reasonable repair estimates rather than guessing. Use these costs when discussing the final price with the seller. … Read more

Buying a Used Car From the Owner vs a Dealer: Which Is Better?

Buying a used car can be a smart way to save money while getting a vehicle that suits your needs. However, one important decision can affect your budget, buying experience, and peace of mind: should you buy a used car directly from the owner or purchase it from a dealer? Both options have advantages and disadvantages. Buying directly from an owner may help you negotiate a lower price and learn more about the car’s history. A dealer may offer more vehicle choices, assistance with paperwork, and, in some cases, a limited warranty. In this guide, we compare buying a used car from an owner vs a dealer in India, covering prices, vehicle condition, paperwork, negotiation, and safety tips to help you make the right decision. 1. Buying a Used Car Directly From the Owner When you buy a used car from its owner, you deal directly with the person who currently owns the vehicle instead of going through a dealership. Advantages of Buying From an Owner Potentially lower prices: Private sellers may offer a lower asking price because there is no dealership margin. However, the final price depends on the vehicle’s condition, demand, age, and local market rates. Better insight into the car’s history: You can ask the owner about driving habits, servicing, repairs, accidents, and the reason for selling. Always verify their answers using service records and an independent inspection. More room for negotiation: Owners may be willing to negotiate based on your budget, how quickly they want to sell, and the car’s condition. Direct communication: You can discuss the vehicle’s maintenance, usage, and known issues directly with the person who has driven it. Disadvantages of Buying From an Owner Buying from an owner can be a good option if you are comfortable checking a vehicle carefully and handling the purchase process. 2. Buying a Used Car From a Dealer A used-car dealer purchases vehicles for resale or helps connect buyers with sellers. Dealers may offer cars from different brands, price ranges, and model years. Advantages of Buying From a Dealer More cars to compare: Dealers often have several vehicles available, making it easier to compare models, features, and prices in one place. Help with paperwork: Some dealers assist with registration certificate (RC) transfer, insurance documentation, and other formalities. Confirm exactly what is included before paying. Possible warranty options: Certain dealers offer limited warranties or certified-used-car programmes. Read the terms carefully, including exclusions, duration, and claim conditions. Potentially convenient purchase: A dealer may help coordinate test drives, inspections, financing, and documentation. Disadvantages of Buying From a Dealer A dealer can be suitable if you value convenience, want multiple cars to compare, or prefer assistance with the buying process. 3. Owner vs Dealer: Quick Comparison Factor Buying From an Owner Buying From a Dealer Price May be lower May be higher Negotiation Direct negotiation Depends on dealer policy Vehicle selection Usually one car per seller Often several cars Maintenance history Ask the owner for records Request available service records Inspection Arrange an independent inspection Verify inspection claims independently Warranty Usually unavailable May be offered; check terms Paperwork Buyer and seller coordinate Dealer may provide assistance Convenience Requires more personal effort Can be more convenient Main concern Verification and fraud prevention Price transparency and vehicle quality Important: Neither option is automatically safer. A well-maintained car sold by a private owner can be a better purchase than a poorly inspected dealer car, and a reputable dealer can offer a smoother experience than an uncooperative private seller. 4. Which Option Is Cheaper? Buying from an owner can sometimes save money, but the lowest advertised price does not always mean the lowest total cost. Before making a decision, calculate the full cost of ownership at the time of purchase. Consider these expenses: For example, suppose a private seller offers a car for ₹4 lakh, while a dealer offers a comparable vehicle for ₹4.25 lakh. If the privately sold car needs ₹40,000 in repairs, the dealer’s car could be the more economical option—provided its condition and documentation are verified. Always compare similar vehicles with similar age, mileage, service history, and condition. 5. Documents to Check Before Buying a Used Car Whether you buy from an owner or a dealer, document verification is essential. Check the following before making the final payment: Never rely only on photocopies or verbal assurances. Verify the information through the appropriate official channels before completing the transaction. 6. How to Inspect a Used Car Before Buying A professional inspection can help identify problems that are difficult to notice during a short test drive. Exterior and Body Look for uneven paint, rust, inconsistent panel gaps, signs of major repairs, and damage around the chassis or body structure. Engine and Mechanical Condition Start the car when the engine is cold, listen for unusual noises, check for warning lights, and look for fluid leaks. Have a qualified mechanic assess any concerns. Tyres, Brakes, and Suspension Check tyre wear, braking performance, steering behaviour, and unusual sounds when driving over bumps. Interior and Electronics Test the air conditioning, infotainment system, lights, windows, seat adjustments, central locking, and other equipment. Test Drive Drive the car on different types of roads when possible. Observe acceleration, braking, gear changes, steering, and engine temperature. Independent Inspection Even if a dealer claims that a vehicle is certified or inspected, review the inspection report and consider arranging an independent evaluation. 7. Warning Signs to Watch Out For Be cautious if a seller or dealer: Never share OTPs, banking passwords, or UPI PINs with a seller. Do not pay the full amount until the vehicle, seller, documents, and payment arrangements have been verified. 8. How Kahi Can Help You Explore Used Cars Finding the right used car starts with comparing suitable options rather than choosing the first vehicle you see. On Kahi, you can explore a marketplace for buying and selling different types of items, including vehicles, depending on available listings. Compare advertised prices, review seller information, ask relevant questions, and arrange … Read more

How to Sell Your Bike Online Quickly in India

Selling your bike online can be a simple way to find interested buyers without visiting multiple dealerships. Whether you want to upgrade to a new motorcycle, sell an unused scooter, or get a better price for your two-wheeler, an online listing can help you connect with potential buyers. However, selling quickly requires more than just posting an advertisement. You need to set the right price, upload clear photographs, write an attractive description, prepare your documents, and respond to genuine enquiries. In this guide, we explain how to sell your bike online quickly in India while avoiding common mistakes and payment scams. 1. Check Your Bike’s Market Value Before creating a listing, research how much similar bikes are selling for in your city. Compare motorcycles or scooters with a similar brand, model, manufacturing year, kilometres travelled, ownership history, and overall condition. For example, if you want to sell a five-year-old scooter, compare it with other scooters of the same model and age rather than newer models with different features. Factors that affect your bike’s resale price Set a realistic asking price based on your research. A price that is too high may discourage potential buyers, while pricing too low could mean losing money unnecessarily. You can leave some reasonable room for negotiation, but avoid setting an unrealistic starting price. 2. Prepare Your Bike Before Listing It First impressions matter when buyers compare several used bikes online. Clean your bike thoroughly, including the body panels, mirrors, wheels, seat, and other visible parts. Check the lights, indicators, brakes, tyres, and other essential components. If the bike has minor problems, consider whether repairing them is worthwhile before selling. Quick preparation checklist You do not necessarily need to spend a lot on repairs or cosmetic improvements. Focus on safety, cleanliness, and presenting the bike accurately. 3. Take Clear Photos of Your Bike Good photographs help buyers understand the condition of your bike before contacting you. Poor or incomplete pictures may reduce interest, even when the vehicle is in good condition. Take photographs in daylight against a clean background. Include pictures of: Use recent photographs of the actual bike. Avoid heavily edited images or pictures taken from other websites. For privacy and safety, do not publicly display sensitive personal information or unnecessarily expose identifying details in your documents. 4. Create a Free Online Bike Listing Once your bike is ready, choose an online classified platform where buyers can browse used two-wheelers. You can explore Kahi.in to post classified advertisements and connect with people interested in buying and selling products. When creating your advertisement, provide accurate information about the bike and make it easy for potential buyers to understand your offer. Details to include in your listing Listing detail What to provide Bike brand and model Exact model and variant Manufacturing year Correct year Kilometres travelled Accurate odometer reading Asking price Realistic expected price Condition Honest description of wear and repairs Ownership Accurate ownership information Location City or relevant locality Contact details Appropriate way for buyers to reach you A complete advertisement can help filter out irrelevant enquiries and attract buyers who are genuinely interested. 5. Write an Attractive Bike Description Your title should clearly identify the bike and include important information that buyers may search for. Instead of writing: “Bike for Sale, Good Condition” Use a more descriptive title, such as: “2022 Honda Shine for Sale – Well Maintained, Single Owner” Only use details such as “single owner” or “well maintained” when they are accurate. In the description, explain why the bike is worth considering. Mention its maintenance history, fuel type, kilometres travelled, insurance status, and any known issues. Here is a simple example: Example bike listing description “Selling my 2022 Honda Shine in good running condition. The bike has been used for regular commuting and has a recorded odometer reading of 18,000 km. Routine maintenance has been carried out, and the vehicle is available for inspection in [your city]. The asking price is ₹55,000, negotiable after inspection. Interested buyers can contact me for further details.” Replace the sample details and price with your actual information. Never make claims about service history, ownership, or condition that you cannot support. 6. Respond to Buyer Enquiries Quickly Once your listing is live, respond to genuine enquiries promptly. Buyers may be comparing several bikes, so clear communication can help keep them interested. Be prepared to answer questions about the price, mileage, condition, insurance, servicing, and availability. When someone contacts you: Prompt responses can make the process smoother, although they cannot guarantee a faster sale. 7. Negotiate the Right Selling Price Many used-bike buyers negotiate before making a purchase. Decide your minimum acceptable price before starting discussions. Consider the bike’s condition, market value, repair requirements, and comparable listings when evaluating offers. If a buyer offers less than your expected price, explain the reasons for your valuation calmly. Maintenance records, a reliable running condition, and accurate documentation can help support your asking price. Do not accept an offer simply because the buyer promises to complete the transaction immediately. Confirm the payment terms and complete the required paperwork before handing over the vehicle. 8. Keep Your Bike-Selling Documents Ready Proper documentation is essential when selling a used two-wheeler in India. Depending on the transaction and applicable requirements, you may need: For a standard registered vehicle transfer, Forms 29 and 30 are commonly relevant. Requirements can vary depending on the transaction and circumstances, so verify the current process with the relevant Regional Transport Office (RTO) or official Parivahan portal. Do not assume that handing over the keys and receiving payment completes the legal transfer. Follow the applicable ownership-transfer procedure and retain copies of the sale documents and submission acknowledgements. 9. Avoid Online Bike-Selling Scams Online marketplaces can connect you with genuine buyers, but you should remain alert throughout the transaction. Common warning signs Fake payment screenshots: A buyer may show an edited screenshot claiming that money has been transferred. Verify the credit independently through your bank. QR-code payment tricks: You generally do … Read more

Rental Agreement in India: Clauses You Must Check Before Signing

Finding a rental home is an important decision, whether you are moving to a new city for work, studying, or looking for a better place for your family. Before collecting the keys, there is one document you should never overlook: the rental agreement. A rental agreement explains the terms and conditions between a landlord and a tenant. It covers rent, security deposit, maintenance responsibilities, notice periods, repairs, and other important rules. Reading it carefully before signing can help you avoid unexpected charges, misunderstandings, and disputes later. If you are searching for a rental property through online listing platforms such as Kahi, understanding these clauses can help you make a more informed decision before finalising a home. In this guide, we explain the most important rental agreement clauses to check before signing in India. What Is a Rental Agreement? A rental agreement is a written document that records the conditions under which a landlord allows a tenant to occupy a property. It generally identifies the parties, describes the property, and sets out their rights and responsibilities. Rental agreements may be used for apartments, independent houses, rooms, and other residential properties. The terminology and legal requirements can vary depending on the state and the type of arrangement. Before signing, make sure the agreement accurately reflects what you and the landlord have discussed. Do not rely only on verbal promises. 1. Monthly Rent and Payment Due Date The rent clause is one of the first things you should review. It should clearly mention the monthly rent, the date payment is due, the accepted payment method, and the account or person to whom payment must be made. Check the following details: Example: If the agreed rent is ₹15,000 per month, ensure that the agreement states this amount clearly and does not introduce unexplained additional monthly fees. Pay rent through a traceable method whenever possible and keep transaction records or receipts. If the landlord requests a change in payment details, verify the new details directly before transferring money. 2. Security Deposit and Refund Conditions The security deposit is often a significant upfront expense for tenants. Before paying it, check the amount and the conditions under which it will be refunded. The agreement should explain: For example, if you pay a deposit of ₹30,000, the agreement should explain when and how you can expect to receive the refundable balance. Do not assume that the same deposit limit applies everywhere. Local tenancy laws and state-specific rules may differ. Ask for a written explanation of any deduction that the landlord proposes. Before moving in, take dated photographs or videos of the property’s condition and keep a signed inventory of existing damage, fixtures, and appliances. 3. Rental Period and Agreement Duration The rental period defines when the agreement begins and ends. Confirm the following: Do not sign an agreement with blank dates or a duration that differs from what you discussed. A short-term rental, a conventional lease, and a leave-and-licence arrangement may be treated differently under applicable law. Make sure the agreement matches the actual arrangement. 4. Notice Period and Early Termination The notice-period clause explains how much advance notice a tenant or landlord must provide to end the agreement. Some agreements specify a notice period of 30 days, while others may use a different period. The appropriate terms depend on the contract and applicable law. Check whether: Important: Ask the landlord to explain any early-exit penalty before you sign. Do not assume you can leave immediately without financial consequences simply because you have found another property. 5. Rent Increase and Renewal Terms A rent-increase clause explains whether and when the rent may change. Before signing, check whether the agreement specifies a fixed increase, a percentage increase, a renewal-based revision, or another mutually agreed method. For example, an agreement might provide for a rent review when the current term ends. The exact amount and timing should be written clearly rather than left to an informal promise. Look for answers to these questions: Avoid vague wording that allows unexpected changes without a clear process. Any rent revision must also comply with applicable law. 6. Maintenance Charges, Repairs, and Utility Bills Disagreements about repairs and utility bills are common sources of rental disputes. The agreement should explain which expenses are paid by the tenant and which remain the landlord’s responsibility. Review the treatment of: For instance, if monthly rent excludes society maintenance, the agreement should state who pays it and how the amount is calculated. Do not accept a general clause making you responsible for every repair without understanding what it covers. Document the property’s condition and discuss any existing problems before moving in. 7. Property Use and Restrictions The property-use clause explains how you are permitted to use the rented space. It may address residential use, the number of occupants, guests, pets, smoking, noise, and building rules. Check whether the agreement includes restrictions that could affect your daily life. If you have a pet, work from home, need parking, or expect a family member to stay with you, discuss these requirements before signing. You should also verify whether parking is included in the rent or is subject to a separate charge. Do not assume that access to a parking space is guaranteed unless the agreement or a separate written confirmation says so. 8. Landlord’s Right to Enter the Property Tenants generally expect privacy and peaceful use of the rented home. The agreement should explain when and how the landlord may enter the property. Look for terms covering: If the agreement gives the landlord unrestricted access at any time, ask for a clearer and more reasonable process. Where practical, inspections and non-emergency visits should be arranged in advance. Any access terms must remain consistent with applicable law. 9. Property Condition, Repairs, and Inventory Before moving in, make sure the agreement or an attached inventory accurately records what comes with the property. This may include: Take dated photographs and share any significant existing damage with the landlord in writing. This record … Read more